Enable Timed Exams on Open edX

Timed exams are one the features of Open edX that can make a series of questions that have been prepared only accessible and completed within a specific time.
Activate Timed Exams
-
Ask to IT team to Enable Special Exams before timed exams can be used.
-
Open your studio > select a course > select Settings > select Advanced Settings > then search for Enable Timed Exams.

-
Change the value from
falsetotrue, because the default setting isfalse.
Add Timed Exams to Questions
-
On the Course Outline in studio, select a subsection that has a unit of question or assessment.
-
Select the Configure icon for subsection.

-
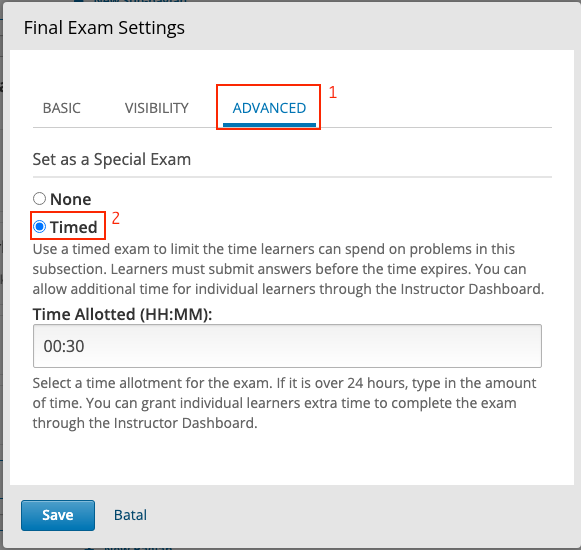
Click Advanced and select Timed under Set as a Special Exam.

-
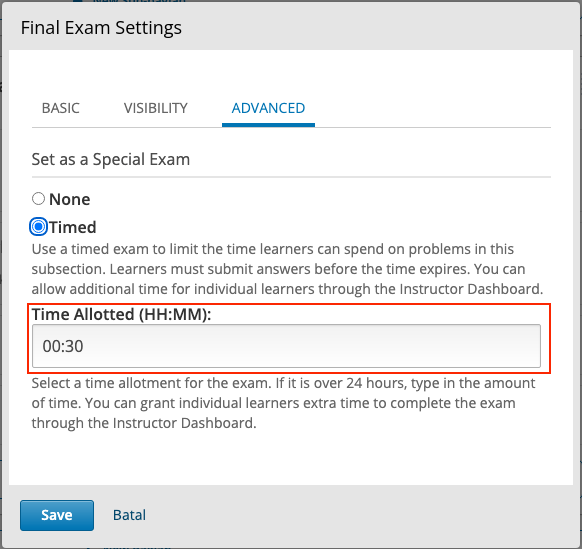
Set the duration then click Save to save the changes.

Apart from the duration that appears, you can use a certain duration as you wish, just manually type in the hours and minutes.

Taking a Timed Exam as Student
-
Go to the main page of the course on the LMS.
-
Open the unit for which the timed exams feature has been set.
-
Click
I am ready to start this timed examto open the questions and the time will also start the countdown.
-
You can answer the questions and if the time is up, the question page will be automatically reloaded. Make sure you hit the Submit button before the time runs out so that your answer can be saved to databases.
Resetting a Timed Exam for Specific Student
-
Go to the Instructors page.

-
Click Special exams.
-
Click Student Special Exam Attempts, a list of students who have accessed units that have a timed exam feature.
-
Click the X icon to clear the student time data.

-
Until this step, you have reset timed exams for specific students.
Giving Extra Time for Specific Student
-
Go to the Instructors page.

-
Click Special exams.
-
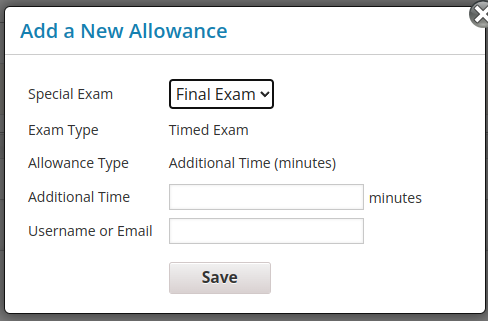
In the allowances section, click Add Allowance.

-
Enter the additional minutes you want to give, also enter the username you want to give additional time, then click Save to save changes.

-
Until this step, you have given additional time to specific students.
